Preface
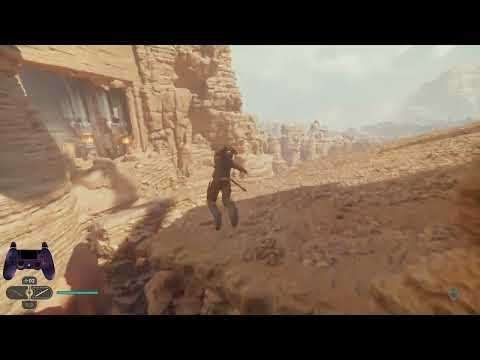
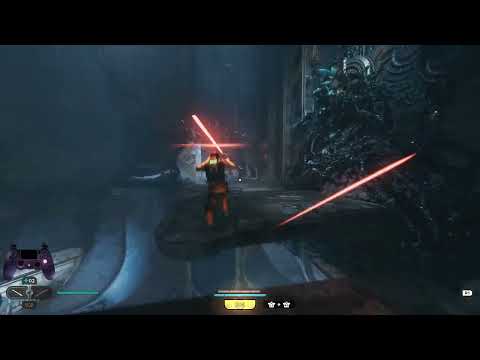
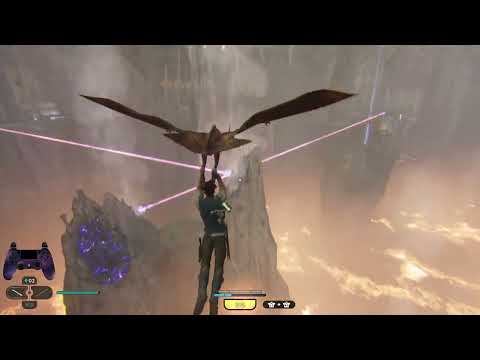
This is the current fastest route possible for completing Jedi: Survivor without glitches.
Rules
- Time starts at the final input of save file creation (before the intro cutscene begins).
- Time ends upon reaching the “Jedi: Survivor” logo, after skipping the final cutscenes.
- There is no difficulty requirement. (Although Story is objectively the fastest)
- Complete all story missions in order, as fast as possible, within the following restrictions:
- The following are BANNED:
- No out of bounds (OOB)
- No clipping (PBC (pause buffer clip), Nekko or F11 clips), or any other method that would allow you to bypass walls, cutscenes, loading triggers, or void-out planes.
- Nekko fast travel/Mantis glitch
- Airwalks of any kind
- Launches of any kind (including dual saber jump cancels)
- Using Focus/Wrenching Pull to traverse up slides in the wrong direction.
- The following are ALLOWED:
- The use of parkour/skills (ADS) to bypass puzzles or platforming is allowed.
- Double dash is allowed.
- You are allowed to continue if you get the sequence break message, as long as you have followed the aforementioned rules.
- The following are BANNED:
Speedtech
Each tech is explained where the route first uses it: Chain Dash Strike in Koboh 1 → Mantis, Dash and Double Dash in Jedha 2 → Dash.
Glitchless uses the following speedtech:
- Shuffling: (explanation to add)
- Chain Dash Strike
- Chain Dash / Double Dash
Coruscant
Tutorial
Turn off tutorials in Gameplay settings during the initial cutscene. This will avoid pop-up windows that occur throughout the entirety of the run. During the tutorial walking segment, position yourself in front of one of the two outer NPCs (wearing yellow, big guy is too slow) and you will gain a slight boost to your walking speed. Cut corners to ensure you don’t “slip” out, and if you do, you can often reposition yourself in front of the other outer NPC. Balance yourself on the NPCs to keep this walking boost throughout the entire walking segment and you can save roughly 15 seconds.
Complete tutorial combat. During the tutorial climbing section, you can skip the slowed down portion right before dropping into the rooftops, by jumping over/around the point where the two beams meet (see clip below).
K-405
Progress normally & obtain double-saber. Meet back up with Bode. Immediately after the cutscene where you meet up with Bode, step to the right side of the generator and jump over it to skip the forced walk.
Progress normally & obtain Focus (console that raises the bridge) & Slow. Continue through the next platforming section, defeat K-405 & obtain the Ascension Cable.
Senator
Progress normally to where you meet up with the rest of the crew. Let the Twins push down the barrier that is blocking you from reaching the climbing section to the Yacht. There are some platforming skips we can do during this climb to the Yacht. First, climb up to the top of the climbing section, but instead of jumping across the gap between ledges, jump upwards and move slightly forwards, landing on top of the climbing ledge. From here you can jump to the platform below, skipping the rest of the climbing section which saves about 5 seconds. Use the normal route if you struggle with this. Secondly, as you climb under the Yacht, you can jump off before the fire to reach the 2nd platform slightly early.
Climb up to the Yacht, board it & confront the Senator.
9th Sister
After leaving the Yacht, progress through Undercity Meats to Freight Depot. You will need to clear out all enemies in Freight Depot before being able to slice the next door. Kill all non-projectile enemies first, then use Double-blade to parry projectiles to kill the rest of the Stormtroopers. You should be able to see all of these enemies when standing at the slice door. Trigger the 9th Sister fight & defeat her.
Mantis
Zipline & Grapple your way to the center platform. You can jump off the Lamp & grapple up to the next zipline to save ~5 seconds. This is very precise & only recommended if you are confident in performing it.
Zipline to the Hangar, meet up with Bode & Bravo, and complete the ending fight on Coruscant. Talk to Bravo & you’ll fly away on the Mantis.
Koboh 1 - Forest Array
Find Greez
Our first objective on our first trip to Koboh, is to find Greez in Pyloon’s Saloon. After crash landing on Koboh, take the elevator to the ground level, and progress through the Crash Gorge Site. When you reach the tar pit, jump down and throw a roller mine into the Dam. You can save ~5 seconds by jumping straight towards the chest.
Head to the next dam in Derelict Dam and climb up to where the Bedlam Raider & B1 droid are. Kill them, and head to the ledge by where you can ambush another raider & droid, but DO NOT JUMP DOWN. Instead, wait up there for a roller mine to come out, and then Force Pull the roller mine up to you, where you can then use it to break the dam you are standing on. There are 2 roller mines you can force pull, and it is recommended to wait for the 2nd one (about 15 sec wait), since it is much more consistent to grab. If you mess up the Force Pull on the 1st roller mine, you will aggravate the enemies and the 2nd roller mine won’t ambush the Bedlam Raider.
After breaking the dam, cross the tar pit to the Dino. Take the elevator down to the mosh pit room & escape it. It’s recommended to use Slow here, because getting shot by the enemies can mess you up. Wall jump & progress into Southern Reach. Head straight to Pyloon’s Saloon, and defeat Zeik. Enter Pyloon’s & meet Greez.
Obtain the Koboh Tuner
Head into the basement of Pyloon’s, meditate (for fast travel) and rest at the bed. Head into Smuggler’s Tunnels & continue until you pick up the Gyro Module. After falling into the Jedi Chamber, skip the first wall run & 2nd platform by jumping straight from the 1st to 3rd platforms. Continue wall running until you meet Zee & solve the puzzle to rescue her. You can pull one of the orbs as Zee just starts walking across the bridge to make her fall, in which she will respawn next to the elevator (~5 sec time save). Take the elevator up to Rambler’s Reach, and enter Pyloon’s Saloon again to obtain the Koboh Tuner.
See video below for optimal movement during this segment:
Reach the Forest Array
After obtaining the Koboh Tuner, leave Pyloon’s Saloon & head to the Forest Array gate, through Swindler’s Wash. There is a precise jump that can be done to quickly get to the side with the gate.
Use the Koboh Tuner to open the Forest Array gate, and continue to the zipline. Activate the zipline, and immediately jump towards the rock sticking out from the wall, & force push the rock. You will fall & void out, but the zipline should now be activated. Take the zipline, and wall run past the waterslide to reach Basalt Rift.
On the left side of Basalt Rift, you can jump across the canyon and skip pretty much this entire section. This is a very precise jump, and will take some practice to perfect. Alternatively, you can force pull the Shield Trooper nearby, and force push the shield into the rock pillar, to knock it down & allowing you to cross the canyon. Both options save about 1 min, but the jump is the fastest option. Once you cross the canyon, continue past the Bilemaw & to Forest Array.
Release Dagan Gera
Once you reach the Forest Array, we can perform the Glitchless variation of the Wampa skip, which requires 2 very precise jumps. Head to the left side, where there are wires connecting these “generator-esque” platforms. You should see a bridge to your left & a platform underneath it on the left hand side. Jump to that platform by jumping onto the ground, and immediately jumping off of the ground up to the platform. You will normally slide on this ground, and thus need to time a 2nd jump perfectly as Cal lands on the ground in order to reach the platform.
From under this platform, we have 2 paths. One is significantly harder, but saves an additional 30 seconds. To do the quick route, jump up to the circular outcropping and use that to get another jump up to the bridge level. For the slower but safer route, turn to your right and climb across to the essence. Go up the ramp and open the door, and you can run across the Wampa bridge.
Climb up the grate & you will be able to walk up to the roof, even though it has yet to fall (triggered from the Wampa). This will appear as though you are walking on invisible stairs, and will appear like you are clipping through the roof. Jump down & place the orb into the laser to break the Koboh Matter.
Continue into the Rawka room you just unlocked, and do some platforming to escape. Progress to Bilemaw Den and unlock Relter Tame. Glide with the Relter back to Forest Array. Glide with the 2nd Relter into the central circle.
From here, there is a jump that can be used to skip releasing the bird. Facing the locked door, drop down into the Koboh dust on the left, and head towards the bridge. There is a hexagonal pillar underneath the bridge that you can jump onto, and use to jump up to the bridge.
Unlock the shortcut door, grab the orb, and solve the puzzle to take the elevator up to Dagan. Enter the chamber containing Dagan, & complete the Tanalorr “cutscene”. Defeat Dagan Gera. This is the first of 3 times we will fight him.
Mantis
After defeating Dagan Gera, take the zipline & Relter to Nekko Pools. Unlock Nekko Tame, and use the Nekko to head back to the Mantis. There is a shortcut through Bygone Settlement, near the first zipline you can reach. Jump off the Nekko up to the zipline, and jump from the zipline to the ledge. This is fairly precise, but not too difficult.
Trigger the Mantis fly-by, and head to the landing pad. Talk to Zee & fly to Jedha.
IMPORTANT: While flying to Jedha, make sure to rest at the meditation point and unlock Aerial Dash Strike (ADS). This skill is the bread & butter of the Glitchless run, and will allow us to perform a good amount of skips throughout the rest of the run. You will also buy Dash Strike as a prerequisite. This is now the fastest movement tech for Cal. You can chain Dash Strike to save some extra time over the normal shuffling speed tech. Use this anywhere you can up until we unlock Dash on Jedha 2.
Jedha 1 - Archive
Rendezvous with Merrin
Immediately after landing on Jedha, we can test out our first ADS skip. On the right ledge directly outside the Mantis, there are some Hardshells that can be targeted for an ADS, saving about 5-10 seconds of platforming. Continue along this climbing section until reaching the med pad.
Head towards the shortcut rope on the right side of the first Skriton area (Monastery Walls). Force Pull one of the Stormtroopers in the room with the chest, and Force Push them up to where the shortcut rope is. Immediately after using Force Push, lock on to the Stormtrooper & use ADS to reach the higher ledge. This saves about 30 sec - 1 min.
Head to the right past the Flametroopers. You can skip this small climbing section with a precise Jedi Flip to the meditation point. Trigger the cutscene during the next climbing section, and you will fall down and land in a slide. Towards the end of the slide, jump and use ADS to reach the ledge where the Stormtroopers are standing. Force Pull / Push the block to bring it to the ground level. Note: This can trigger a sequence break message to appear. Make sure to ‘Proceed Anyway’ here, and DO NOT load the last valid save. Fight the first two waves of enemies to trigger the cutscene where you meet Merrin. After getting this cutscene, we are free to leave, and do not need to finish the rest of the fight. Push the box into the correct position, & jump out of the arena.
After escaping the arena, there is a sneaky ADS we can do to go straight to Merrin’s speeder. Jump onto the lamp near the hole in the bridge. From the lamp, jump towards the hole, lock on to a Stormtrooper and ADS through the bridge towards the speeder. Finish the fight, interact with the speeder, and then interact with the grapple point to have Merrin help you escape. Wall run through the next area and head to Halls of Ranvell.
Halls of Ranvell Skip
Halls of Ranvell is home to one of the harder ADS strategies. This specific one can save about 1-2min. From the Halls of Ranvell meditation point, head to the left area and drop down into the fight. DO NOT FIGHT these enemies. Instead, Force Push one of the Stormtroopers across the gap to land on the grate walkway further in the level. Using Slow helps immensely here. You need 3 Force Pushes to complete this. If you mess up, kill enough Stormtroopers to replenish your force, and try again. There is also the meditation point you can rest at if you need to reload enemies. Once the Trooper is in position, Jump, Jedi Flip & ADS towards that Stormtrooper. You should be close enough to grapple to the underside of this walkway. Now position yourself near the statue (see clip below) and jump slightly outwards, and Jedi Flip up to the walkway. Cal should grab the ledge and pull himself up.
Climb up to the top platform, and then we can jump down into the Skriton pit. Defeat the Skriton & escape to the Spammels.
Archive
Tame the Spammel, and ride it through the sandstorm. At the very beginning of the Spammel ride, you can do a few attacks for a small boost. This gets locked after a little bit. Progress through the sandstorm until you reach the AT-ST fight. Defeat the AT-ST and progress to the Archive.
Reach the outside of the Archive, & meet Eno. Take the elevator down & meet Cere. Obtain the Blaster stance, and fly back to Koboh.
Koboh 2 - Devastated Settlement
Caij
After landing on Koboh, grab a Nekko & head towards Igneous Fissure, through Harvest Ridge. Use the Relter to glide to Igneous Fissure & use the 2nd Relter to glide into the Korej Lim fight. Defeat the Korej Lim bounty hunter, and meet Caij.
Koboh Grinder Skip
Climb up to the Gorocco, and take the Relter towards the 1st laser. If you don’t step on the broken bridge, and jump straight to the Relter, you can get a vertical boost when grabbing the Relter, which can take you straight to the upper ledge. Head into the room on the right, where the first laser’s orb is. Complete this first puzzle, and bring the orb back to the laser. Position it to hit the geyser, and fly with the Relter into the jet stream to reach the 2nd puzzle.
Lead one of the B1 droids into the next room. DO NOT DROP DOWN into the pit with the two Goroccos. We do not need the Koboh Grinder ability. Instead, jump & ADS across the gap to the other B1 droids. From here you can grab the 2nd orb and throw it back towards the entrance. Jump & ADS back across the gap using the B1 droid we dragged in earlier. Put the orb into the 2nd laser, and use the laser to break the 2nd geyser. Skipping Koboh Grinder saves about 3 minutes, and we do not need it for the rest of the run thanks to other Glitchless skips.
Grand Courtyard
Glide with a Relter into the 2nd geyser’s jet stream to reach the 3rd puzzle. DO NOT DO the 3rd puzzle. Instead, we will use the Relter’s dive ability into the 2nd geyser, to provide a vertical boost great enough to reach the Grand Courtyard. This skips the need for the 3rd laser & 3rd geyser, saving about 1 min. It’s best to glide with the Relter normally, and start diving as you reach the geyser. Diving into the jet stream is what creates the boost, and you should be able to jump up to the Grand Courtyard after doing so.
Head into the courtyard and defeat Tague Louesh. Continue further into this building, until you grab the compass. DO NOT WAIT for the Force Echo to play out. Instead, just walk back in from the way you came, and you can end the Force Echo early. Rest at the meditation point & buy the Gathering Tempest & Vortex Dive skills for the Double-Blade stance. Vortex Dive is fantastic for quick combat, and can shred most bosses & large enemies. Use this pretty much whenever you are in combat. Fast travel to the Landing Pad, and fly to Shattered Moon.
Shattered Moon 1 - Automated Forge & Assembly Staging
Reprogrammed Magnaguard Skip
After landing on Shattered Moon, take the elevator down to the lower level (Automated Forge) & progress through the short climbing section until you reach the Automated Forge meditation point. Start heading through the tunnel section, but don’t go too far. Look for the vents outside of the tunnels out to the right. We are going to use these vents for an ADS skip, to avoid the B1 army & Reprogrammed Magnaguard fights. There should be 1 larger Bedlam Raider (has a jetpack). We cannot Force Push this raider, so just ignore him. We can use him for filling our Force meter if we mess up the first ADS attempt. If you go through the tunnel near this raider, there should be 2 normal Bedlam Raiders, which we can Force Push. Lead these raiders back to the vents. Jump out onto the vents, Force Pull one of the smaller Bedlam Raiders, and Force Push (2 pushes) the raider to the ledge where the zipline heads to. If you accidentally killed this raider, replenish your force on the raider with the jetpack, and try again. There is the meditation point you can rest at to reset the enemies if you mess up both attempts. After the raider has been thrown to the target position, use ADS to get to that platform yourself. This saves about 2-3 minutes if done perfectly.
Assembly Staging
Continue to the climbing section and make your way across all the ziplines. Continue through the level as fast as possible until you reach the Array Channel meditation point. This section just requires clean platforming.
Crossguard Stance
After reaching the Array Channel door & meditation point (don’t grab), grapple to the grated ceiling in the direction of Drya Thorne & the Crossguard. Rather than climbing up normally, we can actually jump directly to the rope swings.
Swing across, pick up the compass, and defeat Drya Thorne. Obtain the Crossguard and complete the fighting section with it. MAKE SURE to set your stances back to Single-Blade & Double-Blade. Zipline back to the Mantis & fly to Jedha.
Jedha 2 - Sanctuary Temple
Narkis Highlands
First off, hand the 2 compasses you collected in Devastated Settlement and on Shattered Moon to Eno. Grab the Archive meditation point (for fast travel later) and follow Merrin out of the Archive. Ride a Spammel through Arid Flats to reach Narkis Highlands. Progress through this climbing section, complete the puzzle, and head past the Skriton to Trailhead Pantheon.
Whistling Drop Skip
Head into the room with the Sutaban, but DO NOT KILL IT. Save the Sutaban for extra Force if necessary. Pull the grate leading into the next room. Standing under the opening you just created, jump up to the little ledge in the wall. You can stand here, and jump again to climb up (who needs boxes?). Grab a Hardshell using Force Pull, and stand in the right side of the opening (facing into the room with the Sutaban). Be careful to not walk into the rope, or you will grab it and drop the Hardshell. Force Push (use 2 pushes) the Hardshell up to the platform above you, and while it is mid-air, lock on to it, and ADS up to the platform. Continue outside towards the Trailhead Pantheon meditation point.
This skips 3-5 minutes, and arguably the most annoying area of the game (Whistling Drop). If you run out of Force, let the Sutaban damage you to regain some (or just kill it). There are a finite amount of Hardshells though, and no nearby meditation point, so be sure to practice this a bit. It’s not hard to perform, but can end your run if you mess it up too many times.
Crypt Skip
From the meditation point, head into the circular room with 2 Stormtroopers. Force Pull one of them, and bring them back to the meditation point. Force push them across the canyon towards the zipline shortcut. With a precisely timed Jedi Flip and ADS, you can cross this canyon. Head to the left and you will be at the backside of the Crypt of Uhrma puzzle, and we will still be able to interact with the puzzle pieces. Solve this puzzle by using Force Pull on the two upper outer pieces, and the two lower inner pieces. Leave the Crypt through its entrance, and head through Blustery Mesa to reach the Timeworn Bridge meditation point.
Dash
Meet back up with Merrin, and use Dash Strikes during the “cutscene” to get to the fight quicker. You can use this tech while Merrin clears the ruins after the fight also, as well as any other “moveable cutscene” in the game. After Merrin clears the ruins, activate the zipline shortcut, Force pull the box to move the wind, and jump into the hole far off to the right (using the wind) to reach the Singing Ruins. Complete the puzzle here, and drop down. Open the door and jump into the wind, and you will be rewarded with the Dash ability.
This should now be used as your main movement tech. You can rapidly chain Dashes together, which is the fastest way to travel on foot. Additionally, if you Dash near the edge of a ledge, while still over ground, your Dash will get reset, and you will be able to perform 2 Dashes within 1 jump. We call this Double Dash & this is somewhat precise, but not difficult to get the hang of. This will be essential for a lot of skips for the remainder of the run, including this next one!
Timeworn Bridge Skip
After unlocking Dash, head back to the Timeworn Bridge meditation point, and make sure to rest. The next skip has soft-lock potential, and you will want this save point in case you mess up. This skip is one of the hardest ADS skips of the run. The difficulty is amplified by the fact that you only get 1 chance to do this, or else you will need to complete this area the intended way, or when soft-locked you will need to reload the save.
Head to the end of the bridge, near where the Flame Trooper & Stormtrooper are. Force Pull the Stormtrooper, and Force Push (2 pushes) him across to the central bridge platform, where the chest is. Kill the Flame Trooper to replenish your force. Now Dash & ADS to the central platform (using the Stormtrooper you just threw), but DO NOT KILL the Stormtrooper. Force Pull the Stormtrooper again, and Force Push (3 pushes this time) him across the next gap. Note: You will want to aim this Force Push a bit higher, so you can reach him with the 3rd push. Now, Double Dash & ADS across the last gap (to the Stormtrooper) and you will have finished this skip, saving about 1 min.
Note: It’s important to note that after Force Pushing the Stormtrooper the 2nd time, he will be too far away from his original position and will respawn after some time. Make sure to land this Double Dash ADS first try, and immediately after throwing the Stormtrooper.
If you mess up the 1st Force Push / ADS of this skip, just continue through Timeworn Bridge the intended way. If you mess up the 2nd Force Push / ADS of this skip, then you will be soft-locked on the central platform, and will need to quit out. Reload your save and try again, or take the intended path to be safe.
Sanctuary Temple
After crossing the bridge, you can use a precise double dash jump to skip a small platforming section.
Continue on into Sanctuary Temple. There aren’t really any skips we can do here, so just drop down into the circular room, and head through the climbing section. You should pass by one of the robot squid’s arms. Continue down this tunnel until you reach the next room, with a pool of water. Enter the pool, and swim through the tunnel to reach Brother Armias. Interact with the door to Armias, and after skipping the cutscene you will now have Merrin’s Charm, allowing you to dash through green laser barriers.
Use Merrin’s Charm to make your way back to the first room of Sanctuary Temple. During this, right before re-entering the Temple, you can do a double dash as a shortcut.
Continue past the zipline and you can now head through the green barrier that you passed by earlier. Continue through this section until you defeat the Robot Squid & end back up in Trailhead Pantheon. Sit at this meditation point, and fast travel back to the Archive. Hand Cere the Contact Codes, and then head to the Mantis to fly back to Koboh.
Koboh 3 - Lucrehulk
Viscid Bog
After landing on Koboh, head to the Pyloon’s Saloon meditation point and fast travel to Grand Courtyard. Glide with the Relter to the large green laser barrier back towards the original entrance of Devastated Settlement. Dash through this barrier and continue onwards until you meet up with Bode. Look at the locations Bode points out, and then take the Relter to the central island in Viscid Bog. You can fly around to the left side, to get as close as possible to the zipline. Use the zipline to cross over into Loading Gantry.
Loading Gantry
Test to see if you have the bug where your dash gets caught by the ledge guard (I almost always get this at this point in the game). If so, then grab the meditation point and quit out to fix that bug. We will need Double Dash for this area. If it isn’t bugged, then skip the meditation point.
Go through the crawl space. There is a very precise double dash jump we can do in this area, to skip the tar without having to complete the fight, and subsequently wait for Bode to drop the container. Jump up onto the container on the right, near the tar. Jump to the iron fence, and then double dash across the tar pit to the ship. Aim for the buoy, and you should be able to jump up onto the ship and continue onwards. Grapple up to the next part, and then you can Jedi Flip and Dash to avoid climbing fully around the side.
Dash towards the blue grates and climb past the electrical fire Bode puts out. Make your way to the top of the last wall run, and double dash across to the wall run on your left. Backtrack a bit (jump over the ledge and back) to hit the loading trigger for the next grapple point, and grapple up to the meditation point (but don’t sit at it).
Hangar Rafters
From Hangar Rafters, you can ADS for a small shortcut straight to the enemies in the side room.
Grapple up to the wall runs and head into the electrical cable room (with the B1 droids). Instead of doing the intended platforming, Double Dash around the left side to reach some pipes. Continue from here and use a precise Double Dash to skip a long climbing section (saving ~30sec-1min). Continue on until you reach the Bode cutscene and eventually Lucrehulk Core.
Lucrehulk Core
After reaching the Lucrehulk Core, continue straight towards the currently unusable TurboLift. Double Dash around the right side to save about 5 sec off the intended path. You can use Dash and Jedi Flips to progress through this area with the turrets quickly.
When reaching the open room (right after the Scavenger Droid), head towards the electric currents where the moving containers are leaving from. Use Dash Strike to get past the electrical current, and then use the moving walls to quickly reach the Bedlam Smasher. Defeat him, and continue through the next slice door.
Yurt Barracks Skip
This next trick is one of the harder ones, but it allows us to skip the entirety of the Yurt Barracks area. Basically we are going to continually wall run on the moving containers to eventually reach the final battle before acquiring Lift/Slam. Make sure to start by wall running on the right side of these walls. Jump, Jedi Flip, and Dash back to the wall to continue running on it after reaching one of its ends. Once you get close to the platform with all the ships, Jump & Dash to the other side of the moving container, and Jedi Flip into the wall to start wall running again. Now it should just be a relatively easy jump to solid ground. Run straight past the fight and interact with the console to have Bode open the next door. If any of the enemies spawn before you interact with this console, you will have to finish the fight before being able to open the door. When interacting with the console, it’s also best to look away from the door, as sometimes Bode can be in a different area of the Lucrehulk, and doing this will warp him to the door.
Continue on and obtain Lift/Slam to reach Generator Underbelly.
Dagan Gera 2
At the very start of Generator Underbelly, Double Dash to the left side to skip a 5sec walk around. Continue on until you reach the platform with the grate you are expected to pull down & jump to. Instead of using the grate, we can Double Dash into an ADS to reach the next platform. Immediately after, lock on to one of the enemies on the elevator, and ADS up to them.
There aren’t really any more time saves in the Lucrehulk, so just progress as quickly as you can to Dagan Gera and defeat him. Leave the Lucrehulk via the escape pods. Make your way to the Mantis as quick as possible and fly back to Shattered Moon.
Shattered Moon 2 - Research Lab
Array Channel
After landing on Shattered Moon, take the zipline across and make your way to the Array Channel meditation point. If you have enough skill points (5), buy “The Power of Friendship” skill.
Use Lift on the previously unmovable door, and enter the Array Channel. To save about 15 seconds and to keep the laser disabled in this area, we can do a tricky ADS from the boxes on the left side to the grate climb heading into the first firing chamber tunnel. This works best if you kill the Bedlam Raider & B2 droid first, but is still possible with them alive. Jump on the boxes, Force Pull one of the B1 droids, and Force Push 3x into the air by the grate we are trying to reach. Immediately ADS to the airborne droid, and use Jedi Flip & Dash to grab onto the grate. Continue through the firing chamber into the next room. If you mess this up and/or are not comfortable with it, you can run through this area the intended way.
When you reach the turret & lift door, you can actually jump onto the pipes along the right side of the door to skip having to use Lift. There is also a jump from this pipe that skips the next outside area, but that is slower than the upcoming ADS skip. That jump can be an alternative strategy if you don’t have “The Power of Friendship” skill yet.
After exiting the Array Channel for a moment, we can use an ADS to reach the zipline shortcut platform, saving about 30 seconds. Do not drop down, and instead Force Pull a Bedlam Raider up to the platform you are on. Use a stim to refill your force meter, and then use 3 Force Pushes to push the Bedlam Raider across the gap. Use a Double Dash followed by an ADS and Jedi Flip to reach this platform.
Continue onwards through the rest of the Array Channel, where eventually you will take an elevator up to Santari Khri’s Research Lab.
Republic Research Lab
Activate the console in front of you to activate the balloons leading to Rayvis, which we will use later.
Since we skipped picking up the Koboh Grinder earlier, we now need to perform a skip to get past the Koboh Matter blocking the intended path through the Research Lab. We can do this with a precise order of inputs, involving Double Dash & ADS. We are aiming for the platform with the Electro-Dart chest & the two B1 droids. To start, Jump towards the Droids, Dash, Jedi Flip, Force Pull & void out. This will either pull the B1 droid to the edge, or off. If it pulls him off, the other droid should then walk to the edge. If he stays in his original position, then rest to reset the droids, as we won’t be able to reach with ADS. Once one of the B1 droids is standing at the edge of the platform, do the following series of inputs directly after each other. Jump/Dash to start Double Dash, ADS to B1, Dash again, and finally Jedi Flip. You should now reach the platform, and can drop down to pick up the Upgraded Ascension Cable.
Continue along the intended path using Upgraded Ascension Cable, and defeat Rayvis. After defeating Rayvis, drop down to the Balloon below you and go to the Research Lab meditation point. Fast travel to the Mantis and fly back to Koboh.
Koboh 4 - Observatory
Mountain Ascent Skip
Once landing on Koboh, call a Nekko and make your way to Mountain Ascent through Foothill Falls. If you haven’t bought “The Power of Friendship” yet, then do so now. Spend any extra skill points on Force upgrades or combat skills. If you need to rest, then do so now as the next meditation point we cannot rest at.
This area is pretty short to get through the intended way, and even more so with this next ADS skip. Head through the first Charm barrier, and Force Pull/Push one of the Stormtroopers up onto the rock ledge above you. ADS up to this Stormtrooper, and you’ve skipped basically all of this area. If you accidentally kill both of these Stormtroopers, you can use consecutive Dashes through the Charm barrier, to eventually reach the height where you can ADS to one of the Rawkas already on the ledge.
Continue on past the two Bilemaws until you eventually reach Fogged Expanse.
Fogged Expanse Skips
DO NOT REST at the Fogged Expanse meditation point. You can activate it and change skills & etc, but resting will de-spawn a group of perfectly placed Stormtroopers, which we will use for an ADS in a little bit. If you do end up needing to rest for force/stims, it’s not the end of the world, as you can use a slower backup route.
Instead of taking the long way through Fogged Expanse, we are just going to go straight to the crashed plane for Electro-Dart. Force pull one of the Bramliks (the round spikey things) and Force Push it towards the gap by the deactivated Wall Run (where a group of Stormtroopers is standing on). Force Push x2 the Bramlik across the gap to the next platform. Double Dash and ADS to reach the platform. Wall Run, and with a well executed Jump, Jedi Flip & Dash, you can cross the 2nd gap and head up into the plane.
After retrieving Electro-Dart, head to wall runs. Instead of using Electro-Dart, jump to the horizontal wall run and then turn around to reach the 2nd wall run with a Dash. Along the 2nd wall, make sure to get as high as possible so you can Dash and ADS to the group of Stormtroopers on top of the next “wall run”. If you had to rest and these Stormtroopers disappeared, you can Force Pull & ADS the Bramlik you used prior to cross the gap again. Alternatively, you can just quit out after obtaining Electro-Dart, and when you spawn back in all the enemies will have disappeared, allowing you to just use Electro-Dart to get back.
Grab another Bramlik, and this time Force Push 3x up to a pillar near where you would normally Wall Run to. Jump, ADS, Jedi Flip to reach the pillar, and then you can Jump up to skip having to use Electro-Dart to turn on the Wall Run. Continue on to Marl’s Cavern, and if you are quick enough you don’t need to use Electro-Dart to lower the wall.
Imperial Post / Summit Ridge
Continue to the Imperial Post, and grab the meditation point for safety. Occasionally the game will soft lock after the next fight, preventing you from being able to interact with the Stormtrooper. Fight these waves of enemies as fast as you can, we unfortunately cannot avoid this. Continue through the Imperial Post until you reach Rick. Run past him (or kill him, but that’s technically slower) and head on up to Summit Ridge. Use the balloons & Relter to eventually reach the Observatory.
Observatory
To start things off at the Observatory we have our 2nd and final Koboh Matter skip. Crawl through the crack, and use Electro-Dart to open the hole in the ceiling. Go back outside, and drop through the hole. Open the door, and then throw a Balloon through the hole. If you do this at the right angle, you can reach the next floating platform with a well-executed Grapple, Jump, Jedi Flip, Dash. You can also use some collision on the building to get an extra jump as a backup.
Head up the staircase and grab the meditation point for a quick fast travel a little bit later. Run past the big fight at Observatory Understructure, and head towards the Electro-Dart Wall Run. Jump up to where the 2 B1 droids are standing. Kill them, void out, and you should now be able to use Electro-Dart to raise the wall. When climbing to the next floating platform, you can actually jump on top of the small floating “buoys” and use an ADS to reach the next level, skipping a small climbing segment.
When you reach the area with a large number of B1 droids, head to the right side by the spinning balloon arm, and ADS up to the Stormtrooper & Bedlam Raider above. Now head into the room on the right, and reach the 2nd floor (where the stim chest is). Grab another balloon and wiggle it around the edge to bring it up to the 2nd floor. Throw it out to the left of the stim chest, and you can use it to grapple straight to the end of Observatory. We can’t just go straight to Dagan Gera yet though, because we missed a loading trigger that loads in the top floor of the Observatory. Head back to the shortcut by the Diagnostics Corridor meditation point. Fast travel to Observatory Understructure & back to Diagnostics Corridor to reload the area so you can fight Dagan for the final time. You can also quit out here, or fast travel elsewhere for a similar effect. The game just takes much less time to load when fast travelling between meditation points that are close together.
Head back through the shortcut and onto Dagan Gera. Defeat Dagan, and take the elevator back down. Go to the Observatory Understructure meditation point and fast travel to the landing pad. Fly to Jedha; we are now in the end game.
Jedha 3 - Cere
Podrace
The final visit to Jedha is pretty straightforward. Once you arrive, head into the Archive and give Eno Cordova the final compass (that we just received from defeating Dagan). This should trigger a cutscene, and you will be spawned back in a different area of the Archive. Head back to the main room and talk to Eno Cordova again. After Bode’s betrayal, run to the room with the speeder bikes, and race Bode. Take the inside corners for the fastest path through this section. At the end of this “race”, defeat Bode and you will respawn as Cere.
Siege
Defeat all the enemies while playing as Cere. Eventually Merrin will show up, allowing you to head back into the Archive. Continue until you are above the hangar, and complete the puzzle to blow up the two AT-ATs. Once again, you need to wait for Merrin to lower the rope. Head back into the Archive, and kill the 2nd wave of enemies. Open the door to the elevator room, and take the elevator down to the hangar. Defeat all the enemies heading into the hangar, and eventually use Force Slam to collapse the tunnel. Head back into the Archive and you can now fight Darth Vader. Defeat him to respawn as Cal, and then fly to Nova Garon.
Nova Garon
Denvik
Unfortunately Nova Garon is fairly linear & subsequently there aren’t really many skips we can do here. Continue through Nova Garon the intended way, until you eventually reach Central Command. Rather than sliding down the wall, we can actually do a Double Dash to the pillar in the center of the room. As a side effect, none of the enemies will be aggroed, allowing us to instantly use Electro-Dart to continue on towards Denvik.
Bode’s Chambers
After ambushing Denvik, head to Bode’s chambers. Interact with the items in the room in this order: Scan on table, Echo on painting of Kata & Bode, Scan by fort in corner, door into secret room & grab the disc. Interact with the central console and then leave Bode’s chambers.
Mantis
Once you unlock Dark Side Slow, make your way back to the hangar as fast as possible. The only set of enemies you need to fight, is the final set in the hangar (where Merrin comes to help). Finish the fight using Dark Side Slow as frequently as you can, and board the Mantis. Fly to Koboh for the final time.
Koboh 5 - Alignment Tower
Unlock Tanalorr
Immediately grab a Nekko, and use it to jump up to the ledge by the broken bridge. Head to the Alignment Tower. Use Dark Side Slow to defeat the waves of enemies. Turn your difficulty to Jedi Grand Master and start voiding out to lower your health (but do not die yet). Unlock the tower, and once you are at low health, interact with the console to raise it into the sky. Interact with the console again to unlock Tanalorr. Then fall down the elevator shaft to void out and death warp back to the landing pad (die & respawn). Turn your difficulty back to Story, and then fly to Tanalorr.
Tanalorr
There isn’t really much to say about Tanalorr. Chain Dashes to reach the final boss as quickly as possible. MAKE SURE YOUR DIFFICULTY IS SET TO STORY then defeat Bode.
Congrats, you just completed a Glitchless Jedi Survivor speedrun.